How Can Professional Security Camera Installation Protect Your Home?
Security Camera Installation in Melbourne isn’t just about having a camera on the wall – it’s a whole system that watches the front door, the back yard, the garage, and even those hidden corners where a burglar could slip by. Below you’ll find what we’ll cover: the local climate impact, the best camera types for Aussie homes, legal basics, how a pro does the job, a DIY guide, maintenance tips, and a real-world case study.
Why Security Camera Installation Matters in Melbourne
From what I’ve seen, Melbourne’s mix of rainy winters & hot summer evenings creates ideal hiding spots for intruders. Um, the city’s suburbs like st kilda & footscray have a higher turnover of rental properties, which means more opportunities for break-ins — A well-placed camera can act as a deterrent before a thief even reaches the door.
- Visible cameras cut attempted break-ins by up to 70 % in local studies.
- Night-vision lenses handle the low-light conditions after sundown.
- Weather-proof housings survive the occasional hailstorm in the foothills.
And when a crime does happen, footage gives police a clear lead. In my experience, the difference between a quick resolution and a cold case often comes down to whether the homeowner has reliable recordings.
Choosing the Right Camera Type for Your Suburb
Melbourne’s housing stock ranges from brick Victorian terraces to modern timber homes in the east. Each style calls for a different camera shape and mounting method.
- Bullet cameras– Long cylindrical perfect for pointing at a driveway or garden fence.
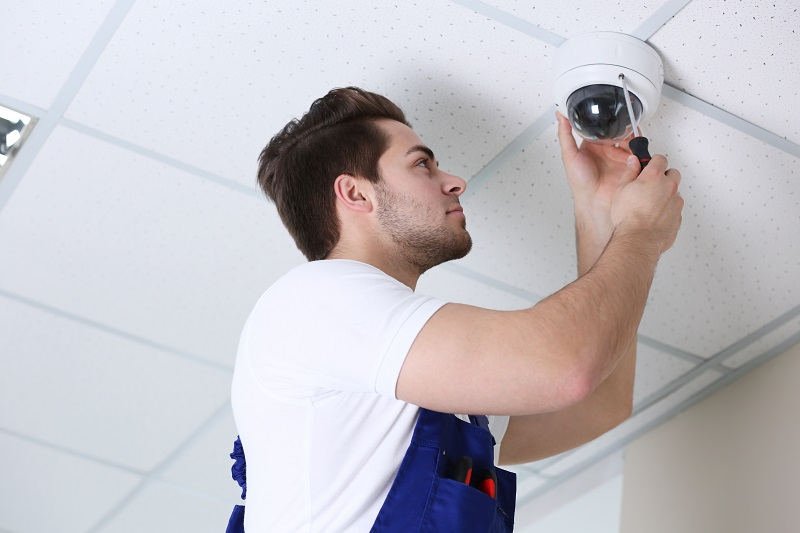
- Dome cameras– Rounded, blend into ceiling tiles, great for indoor hallways.
- PTZ (Pan-Tilt-Zoom) units– Motorised, can sweep a wide front yard from a single spot.
- Solar-powered cameras– Ideal for remote sheds where running a power line is a hassle.
And the choice of resolution matters. A 1080p camera covers a typical backyard with enough detail to read a license plate, while a 4K unit is overkill unless you need to zoom in on a long driveway.
Planning Coverage: From Front Door to Backyard
First, map out entry points: front door, side gate, garage, and any sliding doors. Then, identify blind spots where a burglar could slip by – under the eaves, behind large trees, or the low-lying fence.
- Place a camera at a 45-degree angle to capture the door and the walkway.
- Mount a second unit on the side wall to watch the side gate.
- Use a wide-angle camera on the roof eave to see the garden and pool area.
But don’t forget lighting. A camera with infrared (IR) LEDs works fine in the dark, yet the’ll shine directly into a neighbour’s bedroom if you point it the wrong way. Keep the lens aimed away from neighbouring windows to stay on the right side of privacy laws.
Wired vs Wireless: What Works Best in Aussie Weather
| Aspect | Wired (PoE) | Wireless (Wi-Fi) |
| Reliability | Consistent signal, no interference. | Can drop if the router is overloaded. |
| Installation effort | Requires conduit or hidden cabling. | Mount and pair – easier for DIY. |
| Power source | Powered via Ethernet cable. | Needs separate power or solar panel. |
| Weather resilience | IP66-rated housings protect connections. | Signal may weaken in thick brick walls. |
| Future expansion | Easy to add more cameras on the same switch. | Each new camera adds Wi-Fi load. |
From my experience, a mixed approach works best in Melbourne’s older brick homes – run a few wired cameras where you can hide cables, and add a wireless unit on the roof for the pool area.
Legal and Privacy Checklist for Melbourne Homeowners
Australian privacy law is clear: you can record public spaces, but you must not capture private conversations without consent. The Surveillance Devices Act also says you need to put up a sign telling people a camera is operating.
- Place a sign at the front gate – “CCTV in operation” is enough.
- Mask any neighbour’s windows in the footage using software.
- Do not record audio inside private rooms unless you have explicit consent.
And if you live in a heritage-listed house in Fitzroy, you’ll need council approval before drilling into stone walls. A licensed installer can handle that paperwork for you.
Professional Installation Process – Step by Step…
When you call a pro the first thing they do is a site survey. They walk the perimeter note sun exposure and decide where to run cables.
- Mark the exact mounting points with a pencil.
- Drill pilot holes and seal them with silicone to keep moisture out.
- Run Ethernet or power cables through conduit, keeping them away from hot pipes.
- Mount the camera, adjust the angle, and test the live feed.
- Configure the NVR (Network Video Recorder) and set up remote viewing on your phone.
But the job isn’t finished until they check the weather seal and make sure the camera’s housing is tight. A loose seal can let in rain, which leads to foggy lenses and short-circuiting.
DIY Security Camera Installation Guide for the Handy Homeowner…
Want to save a trip to the trades? You can do most of the work yourself, provided you’re comfortable with a drill & a little networking.
- Start by drawing a simple floor plan on paper and mark each camera spot.
- Choose a camera that supports PoE – it simplifies power and data.
- Buy a PoE switch that matches the number of cameras (e.g., 4-port).
- Run the Ethernet cable through existing wall cavities; if you can’t, use a surface-mount raceway.
- Secure the cable with zip ties every 1 meter to prevent sagging.
- Mount the camera using the supplied bracket; tighten the screws but don’t over-tighten.
- Connect the cable to the switch, power up the NVR, and use the companion app to set motion zones.
And after the install, run a quick test: watch the live feed, walk past the camera, & make sure the motion alert triggers. If the feed is choppy, check the cable length – keep it under 100 m for optimal signal.
Maintenance and Troubleshooting in a Changing Climate
Melbourne’s weather can be fickle, so regular checks keep your system reliable.
- Quarterly: Clean the lens with a soft cloth and mild soap.
- After heavy rain: Inspect the housing seals for cracks.
- Summer: Check the solar panel angle if you have a solar-powered unit.
- Winter: Ensure the IR LEDs are still bright – frost can dull them.
But when something goes wrong, here’s a quick troubleshoot guide:
- Pixelated video – likely a bandwidth issue; reduce resolution or upgrade router.
- No video – check power source, ensure PoE is active.
- Motion alerts not firing – adjust sensitivity in the app.
- Camera flickering – tighten the mounting bracket; wind can shake a loose unit.
Case Study: How a Family in Brighton Secured Their Home
Jane & Mark live in a two-storey brick house on a quiet street in Brighton, and after a series of break-ins in the neighbourhood, they decided to upgrade their security. They hired a local licensed installer who performed a full site survey and recommended a mixed system: two bullet cameras covering the front gate and driveway, a dome camera for the hallway, and a solar-powered PTZ unit for the backyard pool.
The installer chose cameras with IP66 housings to withstand the salty sea breeze that often reaches Brighton’s coastal suburbs. Ran the main cables through the attic keeping them hidden from view and used a poe switch to power all units from a single rack. The NVR was set up to store footage locally on a 2 TB drive with cloud backup for the last 24 hours only satisfying privacy requirements.
Within a week, the family noticed a drop in suspicious activity. A neighbour reported a lone figure lingering near the side gate, but the motion alert on Jane’s phone prompted her to call the police, who apprehended the individual before any theft occurred. The footage later helped the police identify a repeat offender in the area.
Six months later, the system still runs smoothly. The homeowner performs a quick lens clean after the spring rains, and the solar panel continues to charge the PTZ unit even on cloudy days. The peace of mind they now have is priceless, & they’ve recommended the same installer to three other families on their street.
Conclusion
Security Camera Installation in Melbourne is more than a gadget – it’s a tailored solution that takes into account the city’s weather the layout of your home and the legal landscape. By choosing the right camera type planning coverage carefully and either hiring a licensed installer or following a solid DIY guide you can create a robust surveillance net that deters burglars and gives you clear evidence if needed.
Remember to keep the lenses clean, check seals after storms, & stay on the right side of privacy law with proper signage. Whether you go wired, wireless, or a hybrid, the key is to make sure the system is reliable year-round and integrated with your smart-home ecosystem for instant alerts.
Take the first step today: map your entry points, pick a reputable local installer, and protect your Melbourne home with a system that works as hard as you do.