Painting the Inside of Your Home: A Step‑by‑Step Budget‑Friendly Guide
I spent a rainy Saturday scrubbing walls and taping corners in my modest house in the suburb of Marrickville, Australia, trying to turn a dull living room into something fresh. The rain hammered the roof, the kettle boiled, and the scent of fresh paint soon mixed with the aroma of a strong cup of tea. After a few sips and a quick trip to the local Bunnings warehouse, I realized that with a bit of planning, painting the inside of your home in Australia could be both fun and affordable.
Planning for painting the inside of your home on a budget
Last month, I stood in my kitchen staring at cracked paint, wondering if I should just live with it. I decided to map out a simple plan before buying anything. A clear plan saves time and money, so I wrote down each room, measured square footage with a 5‑meter tape measure, and noted any problem spots like water stains, nail holes, or old wallpaper remnants.
Examples of planning steps include:
- List every room and decide on a color palette. I chose a soft dove‑grey for the hallway, a warm sand for the bedroom, and a muted teal for the living room.
- Calculate how many gallons of paint you’ll need using a simple formula: (length × width × height) ÷ 350. For my 12 m² bedroom, the math gave me 1.1 gallons, so I rounded up to two cans to allow for a second coat.
- Set a realistic budget—my total for three rooms was $420, which covered paint, rollers, a few drop cloths, and a small can of primer. I logged the numbers in a spreadsheet on my phone, adding a 10 % contingency for unexpected repairs.
- Check for hidden issues. In the kitchen I found a tiny leak behind the sink; I fixed it with a waterproof sealant before painting, which saved me a later re‑paint.
After jotting down the numbers, I felt confident enough to move on to the next stage.
Choosing tools for painting the inside of your home
When I walked into the hardware aisle, I was overwhelmed by the sheer number of rollers, brushes, and trays. I stuck to the essentials: a 9‑inch nap roller, a 2‑inch angled brush, a paint tray, and a pack of painter’s tape. I also grabbed a sturdy 3‑foot extension pole for the ceiling and a roll of canvas drop cloths that cost $12 at the store.
Because quality tools can make a huge difference, I opted for a mid‑range roller that promised smooth coverage without splatter. The roller’s nap was ¼‑inch, ideal for the smooth plaster walls in my house.
Practical tool tips include:
- Use a microfiber cloth to dust walls before you start; a quick wipe removes cobwebs and leftover grease.
- Cut the painter’s tape at a 45‑degree angle for a crisp edge; this angle helps the tape adhere better around corners.
- Keep a small bucket of water nearby for quick brush cleaning; a damp rag can also wipe away excess paint on the tray.
- Roll in a “W” pattern, then fill in the gaps; this technique reduces roller marks and spreads paint evenly.
If you’re worried about roller marks, try a light “W” stroke, pause, then roll over the same area with a clean part of the roller. The result looks seamless without any extra effort.
Executing each room when painting the inside of your home
My first room was the hallway, a narrow strip that felt like a tunnel. Because the space was tight, I began by taping off the baseboards and ceiling. I used a small ladder to reach the upper edge of the ceiling and a handheld flashlight to spot dust.
Here’s the trick: start with the ceiling, then move to the walls, and finish with the trim. That order prevents drips from ruining freshly painted trim.
Examples of execution steps:
- Apply a thin coat of primer to any patched spots; let it dry for 30 minutes. I used a water‑based primer that cost $15 per 5‑liter bucket.
- Load the roller with paint, roll it onto the tray, then apply in vertical strokes. I worked in 2‑meter sections to keep a wet edge.
- Use the angled brush for corners and edges, blending the brushwork into the roller’s area. The brush’s 2‑inch width let me cut clean lines around windows.
After a couple of hours, the hallway looked brighter, and I felt a surge of confidence. Because each room has its quirks, I treated the bedroom differently—painting the ceiling first because the light fixture was low. I lifted the fixture with a screwdriver, taped around the socket, and painted the ceiling in one smooth pass.
I discovered that a quick second coat, applied after the first dries, eliminates any streaks, much like sanding a piece of wood before varnish. I let the first coat sit for 45 minutes, then lightly sanded with 220‑grit sandpaper before the second coat.
Finishing touches after painting the inside of your home
When the paint dried, I removed the tape and inspected the edges. A few tiny gaps where the brush missed caught my eye. Because a clean finish matters, I used a small artist’s brush to touch up those spots, which took less than five minutes.
Examples of clean‑up steps:
- Wash brushes with warm, soapy water immediately after use; this prevents the bristles from drying stiff.
- Roll up drop cloths carefully to avoid spilling paint; I folded them in thirds and secured the roll with a rubber band.
- Store leftover paint in a sealed container for future touch‑ups. I labeled each can with the room and date, then placed them on a shelf in the garage.
- Lightly sand the trim after it dries with 320‑grit sandpaper; a smooth edge looks razor‑sharp when the light hits it.
Final inspection revealed a uniform sheen across every wall, and the fresh colors made the rooms feel larger and more cohesive.
Budget tricks that saved me cash while painting the inside of your home
When I compared prices online, I found a 5‑liter bucket of paint for $45, which was a steal compared to the $70 cans at the big chain. Because bulk purchases often come with a discount, I bought enough for three rooms in one go.
Here’s the thing: reusing drop cloths and painter’s tape from previous projects can shave off $15 or more. I also took advantage of a loyalty card at the local store, earning a $10 rebate on my purchase.
Practical budget tips include:
- Look for sales on paint during the off‑season, usually in autumn; many retailers discount stock by up to 30 %.
- Use a paint‑matching app to find cheaper alternatives that still match your color; the app suggested a store‑brand that was $8 cheaper per 4‑liter tin.
- Borrow a roller from a neighbor instead of buying a new one; I saved $12 on a roller I would have otherwise purchased.
- Buy a reusable silicone brush for detailed work; it costs $9 and lasts for years, replacing disposable brushes.
With these tricks, I stayed under my $500 budget and still got a professional look.
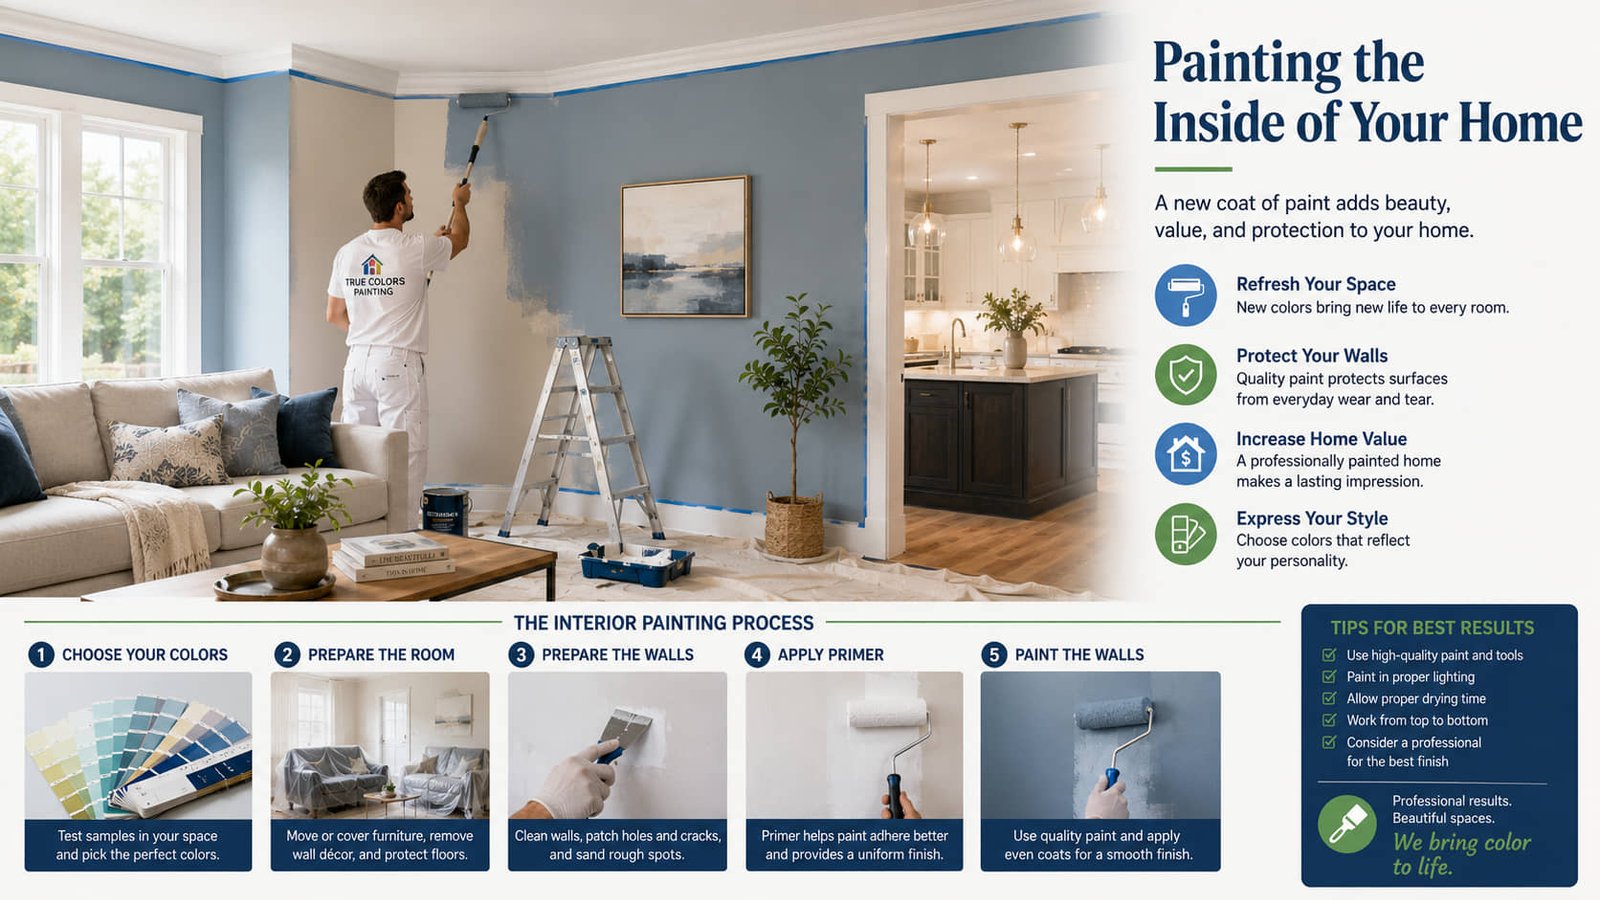
Painting the Inside of Your Home
Common pitfalls and how to avoid them when painting the inside of your home
One mistake I made early on was skipping the primer on a water‑stained wall. The paint peeled after a week. Because primer creates a barrier, always apply it to any spot that’s been repaired or has moisture.
Examples of pitfalls to watch for:
- Forgetting to cover the floor, leading to splatters; a simple sheet of cardboard under the drop cloth can catch drips.
- Using a roller with the wrong nap for the surface (smooth walls need a ¼‑inch nap); a thick nap can leave texture you don’t want.
- Rushing the drying time, which can cause brush marks; I set a timer for 45 minutes between coats.
- Not stirring paint thoroughly; a few minutes with a stir stick prevents color inconsistencies.
- Leaving painter’s tape on for too long; after 24 hours the adhesive can pull off fresh paint.
If you notice any drips, a quick swipe with a damp cloth while the paint is still wet can clean them up easily.
Final Thoughts
After weeks of measuring, taping, rolling, and cleaning, I stepped back and admired the transformation. The living room felt larger, the bedroom cozier, and the hallway finally matched the rest of the house. Because I tackled the project myself, I saved over $300 that would have gone to a contractor, and I gained a sense of pride that only a DIY success can bring.
So, what room will you refresh first, and how will you make it your own? Grab a tape measure, a cup of tea, and start planning – the results are worth every step.